Tag Archives: recipe

Gluten-Free Lasagna!

Standard

I wish I could say this was non-dairy as well, but I can’t. Sorry. 😦

However, this turned out amazing! I was even able to win over 3 gluten-eaters with it, two of which were not told it was GF until half-way through the meal (hehehe). Like with everything else I have been making – this was the first time I have ever attempted to make lasagna. When I think of lasagna, I think of Stoffer’s frozen lasagna or lasagna you order at a restaurant. I never dreamed I would be making a homemade lasagna! But I had a craving, so I knew it had to be done.

I’ve noticed that when I get a craving for something “gluteny” that I use to eat, I need to delve into the “make it yourself & make it yours” world. I really think if I didn’t have this attitude that I would be purposefully glutening myself everyday and going crazy trying to eat all of my favorites one last time. Instead, when I think of something I use to love I try to figure out how to make it and then how to make it gluten-free. I’m all about experimenting, and it’s amazing how good of a cook and baker I have become just in the last couple of weeks. I think I was an ok cook to begin with, but now I’m so much better. Plus, I’m learning to cook GF and healthier. To me it’s an even greater challenge, so I’m that much more proud of myself when I’m able to do it.

Anyway, back to the lasagna…
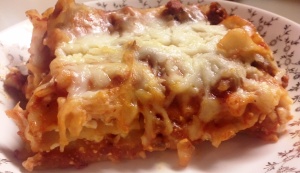
….yum! This thing tastes so much better than this picture makes it look.

Anyone can make this, it’s really not very hard. I didn’t even use a recipe to get me started, I just went with it. Here’s what I did:

In a large skillet, fried 1 lb italian sausage, 1 small diced onion and about 6 diced mushrooms until the meat was done. I poured 1 & 1/2 cans of GF spaghetti sauce into the pan with the meat and stirred well. (Yes, I’ll admit that I was too lazy to make my own sauce.) Set that to the side.

I combined a large container of cottage cheese with about 2-3 cups shredded mozzarella cheese. set that to the side.

Then, I cooked my rice lasagna noodles until they were almost done, but still a little firm. (I made sure to rinse them after boiling them, I think the film they get is nasty, and rinsing them gets rid of it.)

Here’s the fun part: I sprayed a 9×13 glass baking dish with olive oil, then covered the bottom of the pan with a layer of noodles, covered them with some meat sauce, and covered that with some of the cheese mixture. I repeated : a layer of noodles, followed by a layer of meat sauce and then the cheese mixture. Next, I added another layer of noodles and another layer of sauce. That was the top, so I just covered it with shredded mozzarella cheese and grated parmesan cheese. To cook it, I covered it with aluminum foil(sprayed it with oil so the cheese didn’t stick), and baked it for an hour at 350 degrees. Once out of the oven, I let it stand for about 5-10 minutes.

Nom nom nom, Enjoy!

Gluten-Free & Dairy-Free Banana Nut Bread

Standard

Super Simple, Made From Scratch, GF Banana Nut Bread….muffin stlye!

To be completely honest, the only reason I made them “muffin style” is because I do not own a loaf pan yet. 🙂 Anyway, I am so so proud of myself! I have never attempted to make any type  of bread before this, and it turned out amazing! I wish everyone could smell it.

I am still new to the GF world and imagined that everything bread was going to be dry and crumbling. I was wrong! These muffins are amazing, they are moist and sweet. You just have to make them for yourself.

This is my first experience with GF baking, and I was thrilled to find an all-purpose flour. I was stressing out before I went to the store. I was trying to imagine trying to find all of these different types of flours, and how big of a bill they would lead up to. Then, I found the all-purpose GF flour and it made my day.

Ingredients used to get ^^this exact muffin:

2 cups Arrowhead Mills GF All Purpose Baking Mix

1/4 tsp salt

1 tsp baking soda (I actually forgot that the mix had some in it already, but the muffins turned out great so I will probably screw up on purpose and keep adding in extra)

4 eggs

1  cup of Florida Crystals pure organic cane sugar

1/2 heaping cup unsweetened applesauce

2 cups mashed ripe bananas (about 5 medium)

1/3 cup canola oil

1 tsp vanilla extract

1/2 cup chopped walnuts (1/4 cup and 1/4 cup)

In a large mixing bowl, combine the flour, salt and baking soda. In a smaller bowl, combine the eggs, sugar, applesauce, oil, vanilla and bananas. Whisk wet ingredients together and then add them to the dry ingredients. Stir 1/4 cup chopped walnuts into the batter.

Place paper baking cups into the muffin pan. Fill the cups almost to the top with batter. (this will produce a nice top on the muffins) Sprinkle the remaining walnuts on the tops of the muffins.

bake at 350°  for about 20-25 minutes. Do the tooth pick test.   It will yield 18 large muffins, like the one pictured above.

Gluten-Free Stuffed Bell Peppers

Standard

I put gluten-free in the title because they are gluten-free and that’s what this blog is about. However, this is one of the few recipes that I have been able to keep the same, because it has always been gluten-free. I just didn’t know it. I love stuffed peppers, they are super filling and super easy to make. I went to the store a couple of days ago and found these gorgeous and HUGE green bell peppers for only 74 cents a piece (which is excellent in my area) and I couldn’t resist buying them. So, last night I put them to use. Yum!

Note: I am lazy and do not own a rice cooker yet, so I use those boil-in-bag 10 minute rice pouches and they will be my “unit of measure.” Also, I pre-cook everything that goes into the peppers. If you would rather put raw material in the peppers, my recipe probably isn’t for you. I am trying to guestimate on the seasoning amounts, I don’t measure seasoning while cooking. So, use your own judgement.

Ingredients:

4 extra-large & 1 small bell peppers  (or about 5-6 normal/large)

1 packet of boil-in-bag white rice

1 packet of boil-in-bag brown rice

2-2.5 cans tomato sauce

1 can diced tomatoes

1 pound ground beef/chuck

1/3 pound hot breakfast sausage

1/3 cup sour cream

1 tsp onion powder

1 tsp garlic powder

1.5 tsp pepper

1.5 tsp paprika

Directions:

In a medium frying pan, cook the breakfast sausage(crumbled) until done. Put the cooked sausage into a large mixing bowl. In the same frying pan, cook the ground beef (also crumbled) until done. Pour off the grease then put the cooked beef in the bowl with the sausage. Let the meat cool. In a medium pot, boil water and cook the two rice packets for about 10-13 minutes. (Note: I use the brand Success and both the brown and white supposedly take 10 minutes to cook. The white rice is done in 10 mins, the brown is not, it takes about 13 mins. It doesn’t hurt the white rice to let it continue to cook with the brown, so I just leave them both in the water for about 13 mins.) Drain the water off of the rice bags and let them sit. Go back to the meat, it should be cool enough to touch with your hands. Using your hands, crumble up any large pieces of meat and mix the sausage into the beef. Then add both bags of rice to the meat and stir until well mixed.

Drain the can of diced tomatoes and put the tomatoes in the bowl. (all of this is done in the same bowl with the meat & rice, there is never a second bowl) Stir. Put 1 can of tomato sauce and the sour cream into the bowl and stir. Next, add the onion powder, garlic powder, pepper and paprika and stir well. Look at the mixture, it is usually a bit too dry, so I add about 1/2 can of tomato sauce. You do not want the mixture soupy, just make sure it stirs easily and it should be perfect.

Set that to the side and start prepping your bell peppers. Wash them, cut the tops off, and clean up the inside ridges the best you can without puncturing the walls of the peppers. Find a glass dish that will hold all of your peppers when they’re standing up. The dish should have  high enough sides so the peppers dont topple over and out of the pan (trust me…that will just ruin your entire day). Pour tomato sauce in the empty dish, you want to have about a 1/2 inch layer of it on the bottom of the dish. Then, place the empty bell peppers into the dish. I usually put about a tsp of tomato sauce in each of the empty peppers, it seems to help the bottoms cook a little faster, but it is not important flavor-wise. Then, spoon your mixture into all of the bell peppers until they are full. I over-fill them a little bit.   Bake uncovered.

If you bake it right away:     425°      30-35 minutes

You can actually be really flexible with the temps, but if you go above 425 then the peppers have a tendency burn before everything has a chance to cook together. And of course, if you change the temp, don’t forget to give yourself more time to bake it.

Hope you enjoy this recipe it is one of my favorites and can definitely be considered comfort food. I also love it because it is a meal in itself, you really don’t need to fix any sides. The sides go to waste because these peppers are just so filling.

I apologize if I didn’t explain the directions very well, or over explained them. I have never attempted to share recipes with other people. So, if you have any constructive criticism I wouldn’t mind, just please try to be nice about it. 🙂